To
discover the content of this blog visit the "summary" page.
Introduction
First of all I would like to
apologize for my imperfect English, please be indulgent.
Here is the portrait of a young woman (I do not know the name) that makes the pub for maintenance of skin products (photo found for pub Lancôme products) and I intend to reproduce it with the Adobe Illustrator software (CS5).

And here is the result after some effort (and about 30 hours of work):

In general, choose images that are reproduced in large sizes (if possible minimum 1024 x 768 pixels) in order to zoom in the details, with bright lighting and good contrast.
To remain faithful to the portrait, reproduction still has the same difficulties:
• face (light and shadow)
• neck and ears
• nose
• mouth
• eyes and eyebrows
• Hair
• Jewel (no jewelry here) and clothing (no clothes here).
• face (light and shadow)
• neck and ears
• nose
• mouth
• eyes and eyebrows
• Hair
• Jewel (no jewelry here) and clothing (no clothes here).
Face (light and shadow)
To shade the face, I'm going to use, as often a gradient mesh and I advise you to proceed as described in the post “draw a face”.
As advised in that post, I start by drawing an ellipse with the Ellipse tool (L) to secure the oval face...

... then I specify the contour by adding points with the pen tool (P), while ensuring to minimize the number of points, here we go 4 points of the initial ellipse to 13 points for the final path (the green arrow shows the center of the ellipse):

Once satisfied with the results, select on the picture using the eyedropper tool (I) a medium brightness color (neither too light nor too dark, here RGB = 222, 184, 165 in the middle of the forehead) before create a gradient mesh using the dialog box (Object-Create gradient Mesh...).

I usually start
with a gradient mesh of 10 x 10 points (100 points) and it
will be densified progressively when
required. Then simply use the picture to
reproduce colors in each of
the points of the gradient mesh.
If this technique is unfamiliar to you, know that the method is
to enable or disable the trace display by Control-click in the eye of the "Layers" window and use the eyedropper tool to color the selected point with the "direct selection" (A) tool.
The first result is that face roughly reproduced yet, but we will refine throughout the work which follows by expanding the gradient mesh as
needed with mesh gradient tool (G).

Below I have densified gradient mesh on the edges of the face to accentuate the shadows:

In the end, feather 4 pixels will be applied
to the face.
Neck and ears
Neck
The neck is designed with 2 gradient meshes shown below (going behind the face):
The first one to draw the rear part of the
neck...
... and the
second to draw the shoulder (feather 10
pixels).

We add the
shaded part of the neck with a path
filled with a linear gradient of 3 colors
(angle = 50 °) with a
Gaussian blur of 6.6 pixels, described
below:
·
Location
0%, RGB = 222, 184, 165· Location 22%, RGB = 146, 92, 73 (Distribution: 50-50%)
· Location 100%, RGB = 16, 13, 21 (Distribution: 63-37%)
Read the post "Notation for color gradients"
for more information.

Ears
For each ear I draw a gradient mesh (feather 4 pixels) and the shadows are made with 2
linear gradients as below:

The first linear gradient has 2 colors (angle = 0 °) with a Gaussian blur of 2 pixels, as described below:
·
Location
0%, RGB = 146, 92, 73· Location 100%, RGB = 16, 13, 21 (Distribution: 28-72%)

The second linear gradient has the same gradient and Gaussian
blur options than the first.

The second ear is drawn
with the
same techniques.
The next step that I prefer is to continue drawing the nose (but you could choose the eyes, mouth).
Nose
To realize the nose, I generally create another gradient
mesh as below:

Note that the shape of the path is simple and follows the contours and curves of the nose down to the mouth to facilitate future joints. The gradient mesh is also of 10 x 10 points (100 points) and the initial color is the same as that of the face (here RGB = 222, 184, 165).

A first draft according
to the technique previously seen gives
this:

But after overlapping the 2 shapes (see below), we can see that the integration does not give a very satisfactory
result.
The main
difficulty will be to superpose the new gradient mesh to the face. This is why
(little advice), to facilitate the overlapping, I materialize the future
locations of the mouth, eyes and eyebrows that will hide some joints of the
nose with the face (but not all, the
uncovered parts shown by green arrows).
To remedy this it is both necessary to increase the density of the points for the 2 gradient meshes at their intersections and select points close to these intersections and color them in agreement
with each other. This is a work of patience and then experience especially with practice.
A temporarily acceptable result is given below.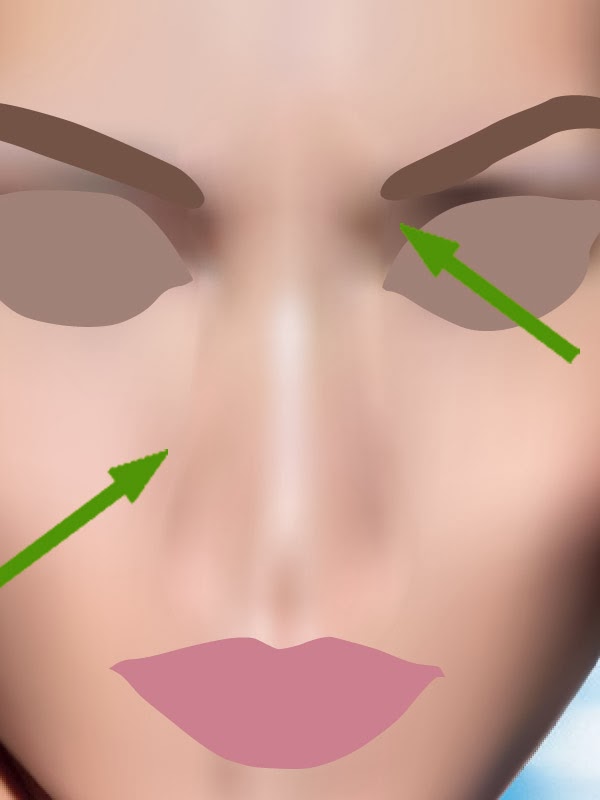
To enhance the holes nostrils, I often
add paths, with feather 3 pixels, as shown
below:

Below are the characteristics
of these linear gradients with 2 colors
(angle = 17 °):
·
Location
0%, RGB = 57, 15, 18· Location 100%, RGB = 56, 10, 13 (Distribution: 27-73%)
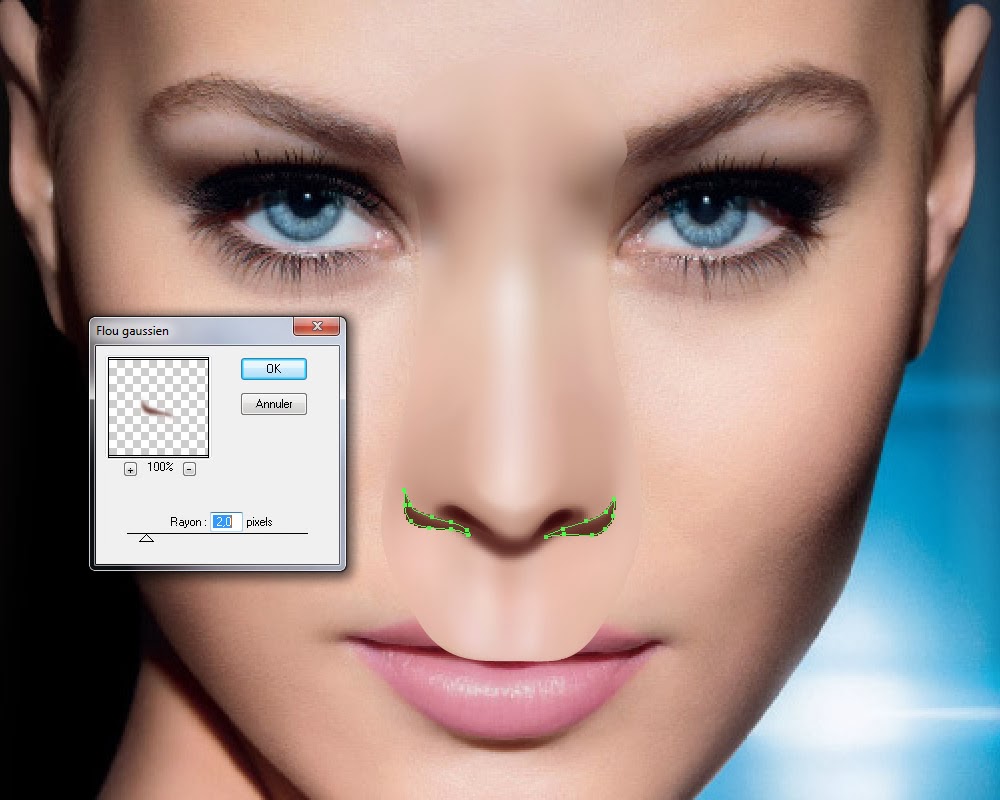
The shadow under the
nostrils is a path of RGB color = 94, 45, 39 with a
Gaussian blur of 2 pixels.

The shadow side of the left nostril is a path with a linear gradient of 2 colors (angle = 96 °) and 1.8 pixel Gaussian blur and feather 11 pixels, described below:
·
Location
0%, RGB = 130, 82, 64· Location 100%, RGB = 211, 168, 150 (Distribution: 15-85%)

And for the shadows
under the nostrils, I draw an object RGB color = 94, 45, 39 with Gaussian
blur 2 pixels.
At this stage, it is possible to
increase the density of
the gradient
mesh of the nose in order to facilitate the overlapping
with the face and draw more details (for example in the
recess above the nose lip).

The result begins to
be correct:

Mouth
The next step is the design of the mouth, often decisive path to reproduce the authenticity of the resemblance. If you want to see details of my technique for drawing the mouth you can see the post "draw a mouth."
If you see a picture of mouth, you will find that the lips have reflections and streaks more or less pronounced depending on the
lighting according to the expression of the subject. This is what we also see in the picture:
• Lips (upper and lower)
• Reflections on the lips
• Streaks on the lips
• Teeth (none here)
• Shadows and lights.
• Reflections on the lips
• Streaks on the lips
• Teeth (none here)
• Shadows and lights.
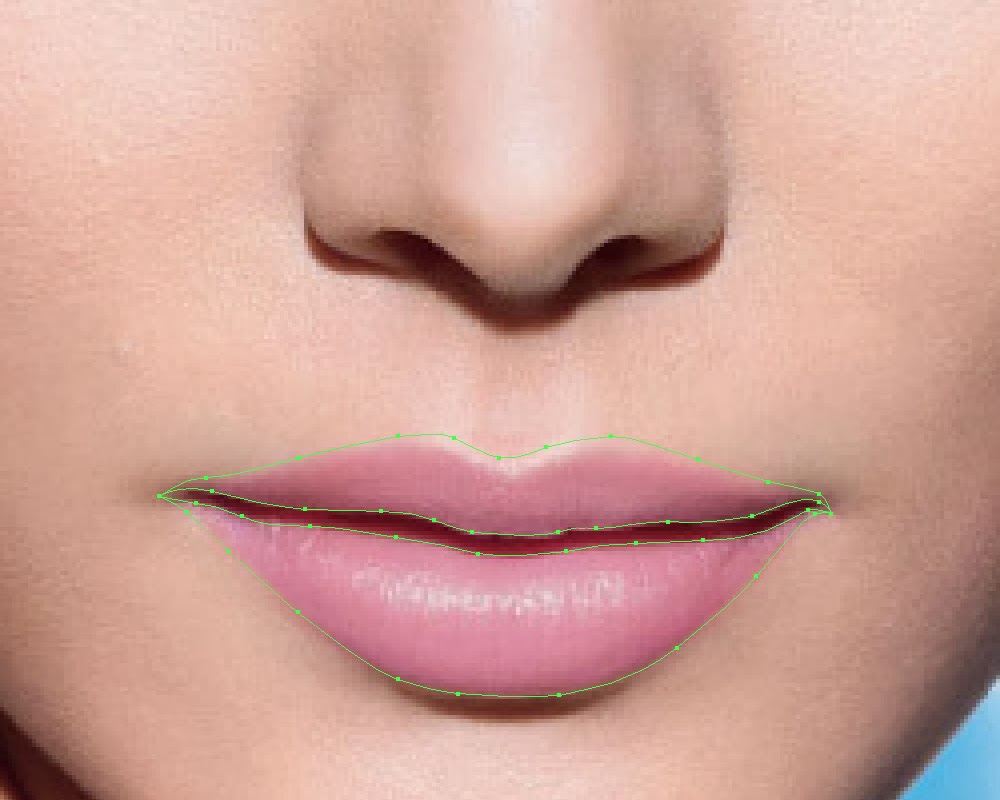
The lips
Starting with the upper lip, I draw 2 paths as below:
I create a blend (option: 12 steps
here) with the
following 2 paths as below:
Path #1: filled
with linear gradient of 6 colors (angle = 0 °, feather 2 pixels),
as described below:· Location 0%, RGB = 134, 29, 48
· Location 29%, RGB = 198, 120, 136 (Distribution: 31-69%)
· Location 49%, RGB = 221, 152, 166 (Distribution: 52-48%)
· Location 65%, RGB = 221, 152, 166 (Distribution: 50-50%)
· Location 85%, RGB = 198, 120, 136 (Distribution: 50-50%)
· Location 100%, RGB = 206, 128, 138 (Distribution: 50-50%)

Path #2: filled with linear
gradient of 6 colors
(angle = 0 °, feather 2 pixels), as described below:
·
Location
0%, RGB = 143, 71, 78· Location 24%, RGB = 143, 71, 78 (Distribution: 72-28%)
· Location 52%, RGB = 198, 120, 136 (Distribution: 45-55%)
· Location 69,5%, RGB = 142, 68, 76 (Distribution: 50-50%)
· Location 89%, RGB = 143, 71, 78 (Distribution: 50-50%)
· Location 100%, RGB = 143, 71, 78 (Distribution: 50-50%)

Read the post "Notation for color gradients"
for more information.
The blend
option is 12 steps:
For the lower lip
I use the same technique as for the upper one, with a blend (option: 15
steps) and the 2 following paths:
Path #1: filled with linear gradient of 6
colors (angle = 0 °, feather 2 pixels),
as described below: · Location 0%, RGB = 198, 120, 136
· Location 24%, RGB = 206, 129, 139 (Distribution: 72-28%)
· Location 52%, RGB = 221, 152, 166 (Distribution: 45-55%)
· Location 72,5%, RGB = 219, 141, 159 (Distribution: 50-50%)
· Location 87%, RGB = 198, 120, 136 (Distribution: 45-55%)
· Location 100%, RGB = 198, 120, 136 (Distribution: 50-50%)

Path #2: filled with linear gradient of 5 colors (angle = 0 °, feather 3 pixels), as described below:
·
Location
5,5%, RGB = 206, 161, 167· Location 19%, RGB = 168, 93, 108 (Distribution: 57-43%)
· Location 40%, RGB = 181, 94, 112 (Distribution: 50-50%)
· Location 72,5%, RGB = 133, 57, 64 (Distribution: 50-50%)
· Location 100%, RGB = 206, 128, 138 (Distribution: 77-23%)

The blend
option is 15 steps:

The mouth opening between the 2 lips is a path (feather 2 pixels) which includes a linear gradient of 6 colors (angle = 0 °), as described below:
·
Location
0%, RGB = 91, 18, 28· Location 26%, RGB = 134, 29, 48 (Distribution: 72-28%)
· Location 42%, RVB = 91, 18, 28 (Distribution: 13,5-86,5%)
· Location 65,5%, RGB = 134, 29, 48 (Distribution: 87-13%)
· Location 83%, RGB = 91, 18, 28 (Distribution: 50-50%)
· Location 100%, RGB = 91, 18, 28 (Distribution: 37-63%)

Reflections on the lips
One can notice on the picture that the face is illuminated from top to bottom with a fairly strong light, which explains the many clear and shaded effects.
· Location 0%, RGB = 202, 136, 142
· Location 35,5%, RGB = 224, 173, 171 (Distribution: 66-34%)
· Location 65%, RGB = 240, 207, 204 (Distribution: 50-50%)
· Location 85%, RGB = 224, 173, 171 (Distribution: 50-50%)
· Location 100%, RGB = 207, 135, 134 (Distribution: 50-50%)

To lighten the lips I use paths (see below) with a Gaussian
Blur 4 pixels and color RGB = 240, 219, 220.

Ditto for the upper lip:

For light effects at the
top of the upper lip I first drew a single line RGB
= 219, 240, 220 from the form
"Dry Brush 3" in the standard library forms (see
arrow below):

Then, the object
has been decomposed (Object-Expand Appearance) to apply a Radial
Blur value 10, with Transparency "Hard Light", opacity 40%:

For light
effects of the middle of the upper lip I drew vertical forms RGB = 240, 219, 220 with reduced opacity
about 15%:

For the light
effects of the lower lip I first created an “art brushe” from a single line
(color not important) to which I applied Effect-Special-Scribble... in order to
obtain a broken line as below.

Then I drew two
lines interlaced with this “art brushe” color RGB = 242, 224, 224 and then I
have expanded the appearance (Object-Expand Appearance) in order to apply a
Gaussian Blur of 0.5 pixels with Transparency "soft Light":

Streaks on the lips
Light streaks on the
lower lip (only) are made using paths of size 0.3 pixel then decomposed
in order to apply a linear gradient of 3 colors
(variable angle depending on the desired effect) Transparency "Lighten" opacity
55%:
·
Location
8%, RGB = 128, 40, 45· Location 57%, RGB = 237, 136, 157 (Distribution: 50-50%)
· Location 100%, RGB = 128, 40, 45 (Distribution: 54-46%)

Dark streaks
on the lip are made with the same
technique as light streaks, but with Transparency "Darken", Gaussian
Blur of 0.5 pixel, 50%
opacity, and with a linear gradient of 3 colors
(variable angle depending on the desired effect):
·
Location
0%, RGB = 238, 214, 215· Location 56%, RGB = 183, 49, 74 (Distribution: 24-76%)
· Location 100%, RGB = 230, 196, 197 (Distribution: 75,5-24,5%)

Shadows and lights
The final result is the image below,
which clearly show that the
mouth overlaid on the face seems
to "float" and we need
to improve the design by adding shadows (see arrows).

Some corrections are
possible by expanding the gradient
mesh face at the connection points of two objects (face and mouth).
The shadow under
the lower lip is obtained with a blend (option 15 steps) having a first path filled with color
RGB = 102, 47, 37, Transparency "Darken" and feather 3 pixels:
And a second path filled with color RGB = 196, 145, 128 and feather 3 pixels:

The corners of the mouth are drawn with simple paths feather 4 pixels, Transparency "Darken", and having a radial gradient of 2 colors (angle 173 ° and pixel aspect ratio 130%):
·
Location
21%, RGB = 176, 122, 108· Location 100%, RGB = 214, 177, 167 (Distribution: 46-54%)


And here is the final
result for
the mouth:

The rest of tutorial for the eyes, eyebrows and hair is published here...
Aucun commentaire:
Enregistrer un commentaire